
Door hardware installation requires precision and the right tools to ensure it’s done correctly. Whether upgrading your home’s security or replacing old handles and locks, proper installation is essential for both functionality and safety. Taking the time to do it right will ensure your door hardware performs optimally.
In this guide, we’ll walk you through everything you need to know. We’ll cover the types of hardware to use, provide step-by-step instructions, and highlight common mistakes to avoid. For quality door hardware and reliable solutions, Madison Door is here to help with a wide range of options to meet your needs.
Types of Door Hardware You’ll Need for Installation
Before you begin, it’s essential to understand the different types of door hardware you’ll need. These components range from locks to hinges, handles, and strike plates. Choosing the right hardware depends on your door type and the level of security you want to achieve. Here’s a breakdown of the most common door hardware components you’ll work with:
Locks
Locks are essential for securing any door. Deadbolts provide strong protection for exterior doors, while mortise locks, often used on high-security doors, combine both a lock and a latch. Cylindrical locks are the most common and affordable option for residential use.
Handles
Handles serve both a functional and aesthetic purpose. Lever handles are commonly used on interior doors for easy operation. Meanwhile, knob handles are a classic choice suitable for both exterior and interior doors.
Hinges and Strikes
Hinges are necessary to allow the door to swing properly, and strike plates keep the door securely in place when closed. Both need to be aligned correctly during installation to ensure smooth door operation.
Tools and Materials Required for Door Hardware Installation
Installing door hardware requires a few essential tools, which may vary depending on the specific hardware. At a minimum, you’ll need a set of flathead and Phillips screwdrivers for attaching the hardware. Additionally, a drill is required to create holes for screws and bolts, and a measuring tape to mark the exact placement of components.
Furthermore, a sharp chisel is essential for mortising locks and strike plates into wooden doors, while a hammer is needed to drive nails, screws, or other fittings. These tools are all available at Madison Door, ensuring you have the right equipment for a smooth and mistake-free installation process. Having everything ready before you start will make the installation much easier.
Preparing the Door for Hardware Installation
Properly preparing your door is a crucial first step in the installation process. If you skip this, your hardware may not fit correctly, leading to issues down the line. Here’s how you can get your door ready for hardware installation:
Step 1: Measure the Door
Start by measuring the door for accuracy. Use a measuring tape to determine where the strike plate, lockset, and other components will be placed. It’s important to mark these areas before you begin drilling.
Step 2: Mark the Placement
Once you have your measurements, use a pencil to mark where each piece of hardware will go. A common mistake is to place hardware without properly aligning it, so double-check the positioning before proceeding.
Step 3: Drill Holes
Using your drill, create holes for the hardware to fit into. Ensure that your drill bit matches the size of the hardware you’re installing. For instance, a latch bolt will require a different-sized hole than a strike plate.
Step-by-Step Guide for Installing Door Hardware
Now, we get to the heart of the process. Here’s a simple, easy-to-follow step-by-step guide to help you install your door hardware like a pro.
Step 1: Install the Lockset and Strike Plate
First, insert the lockset into the hole you drilled earlier. Align it with the strike plate (the metal plate that the lock engages when the door is closed). Screw the lockset and strike plate into place.
Step 2: Attach the Hinges and Align the Door
Next, install the hinges on both the door and the doorframe. The hinges must be aligned correctly to allow the door to swing freely. Mark their positions and use screws to secure them firmly.
Step 3: Attach the Door Handle
Now, place the door handle on the designated spot. For lever handles, attach the spindle and secure it with screws. For knob handles, make sure the hole is sized correctly before installing.
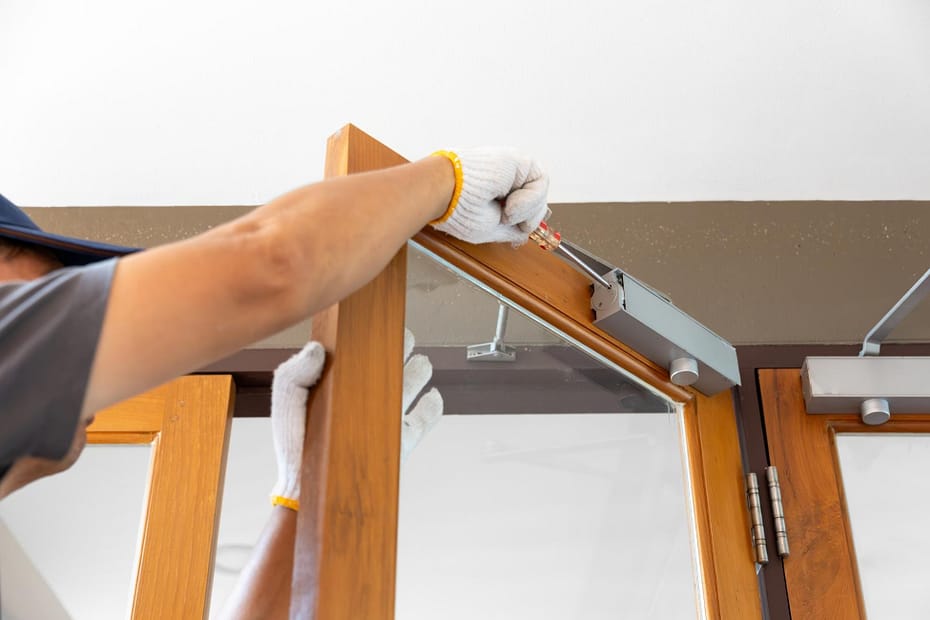
Step 4: Install the Closer and Bolts for Security
If you’re installing a door closer (a device that automatically closes the door), follow the manufacturer’s instructions to attach it securely. For additional security, add bolts that lock the door shut when not in use.
Common Door Hardware Installation Mistakes & How to Avoid Them
Even experienced DIYers can make mistakes during door hardware installation. Common errors include misalignment of components. This can prevent the door from closing properly or cause the locks to malfunction. To avoid this, always double-check your measurements before drilling. Another mistake is drilling holes that are too large, which can cause the hardware to fit loosely and compromise security. Ensure you use the correct size drill bit for the screws or bolts.
Additionally, many forget to test the hardware after installation. Always check that the lock turns smoothly, the handle operates properly, and the door opens and closes securely before finishing. Testing ensures that everything functions as expected and helps avoid any last-minute issues.
Enhancing Door Security with the Right Hardware
When choosing door hardware, security should be a top priority. Here are some options for enhancing the security of your doors:
- Deadbolts: A must-have for exterior doors, deadbolts offer extra protection and can deter intruders.
- Smart Locks: For modern homes, smart locks are an excellent way to enhance security and convenience.
- Reinforced Hardware: Use reinforced strike plates to prevent forced entry.
Selecting the right hardware will not only improve your home’s security but also add to its overall aesthetic.
How to Maintain Your Door Hardware
Proper maintenance is essential for ensuring the longevity and functionality of your door hardware. Regular upkeep will not only keep your doors operating smoothly but also help prevent costly repairs or replacements. Here are some essential maintenance tips to keep your door hardware in top condition:
Clean the Hardware Regularly
Dirt, dust, and grime can accumulate on door hardware, affecting its performance and appearance. To clean your locks, handles, and hinges, use a soft cloth and mild soap solution. For more stubborn grime, a non-abrasive cleaner can be used, but avoid harsh chemicals that could damage the finish.
While bacterial contamination is predominant, the finding of viruses such as rotavirus, norovirus, and even SARS-CoV-2 highlights the stringency of cleaning that must be applied. These findings emphasize the need for targeted hygiene interventions to reduce the risk of pathogen transmission via door handles, particularly in high-traffic areas. Be sure to wipe down the hardware regularly to maintain its look, functionality, and cleanliness.
Lubricate Moving Parts
The moving parts of your door hardware, such as hinges, latches, and locks, need lubrication to ensure smooth operation. Use a silicone-based lubricant or a graphite powder to lubricate the hinges and lock mechanisms. Avoid using oil-based lubricants, as they can attract dust and dirt, which could cause further wear. Apply lubricant every 6 months, or more frequently if you notice resistance or squeaking.
Inspect for Wear and Tear
Over time, even high-quality door hardware will experience some wear and tear. Regularly check the hinges, locks, and strike plates for signs of damage or loosening. If you notice any issues, address them promptly. Tighten screws as needed and replace any worn parts to prevent further damage.
Check for Proper Alignment
Proper alignment is crucial for door hardware to function properly. Over time, doors can shift, causing misaligned locks or strike plates, which may prevent the door from closing securely. Periodically check that all components are aligned correctly and adjust as necessary. If needed, reposition the strike plate or adjust the hinges to ensure the door closes properly every time.
Conclusion
Proper door hardware installation is key to both security and aesthetics. By following this guide, you can confidently install everything from locks to handles. This ensures that your doors function smoothly and securely. Take your time, measure twice, and use the right tools to get the job done right.
At Madison Door, we offer a wide selection of high-quality door hardware to suit your needs. Whether you’re upgrading your home’s security or replacing old hardware, we have the perfect solution. Request a quote today for expert advice, top-notch products, and professional installation services.
FAQs
What hardware do you need to install a door?
To install a door, you’ll need hinges, locks, strike plates, handles, and screws. Depending on the door type, you may also need a deadbolt or door closer. Ensure you have the correct drill bits, a screwdriver, and a measuring tape for precise placement.
What are the hardware parts of a door?
The main hardware parts of a door include hinges, locks, strike plates, handles (or knobs), and latch bolts. Additional components may include door closers, bolts, and door stoppers. Each part plays a role in the door’s functionality and security.
Do you put hinges on a door or frame first?
You should install the hinges on the door first before attaching it to the frame. Mark the hinge positions on the door and frame, then use a chisel to create mortises. Once the hinges are secured to the door, hang the door on the frame by attaching the hinges to the doorframe.
What is the first step when installing an exterior door?
The first step in installing an exterior door is to prepare the opening. Measure the doorframe to ensure it fits correctly and make any necessary adjustments. After confirming the fit, proceed with installing the hinges and locks before securing the door in place.