
Painting your interior doors is one of the most cost-effective ways to transform your entire home’s appearance. Learning how to paint an interior door properly can dramatically update your space for a fraction of the cost of door replacement. Here are some best tips to keep in mind. Whether you’re refreshing yellowed doors or completely changing your home’s color scheme, the right techniques make all the difference.
Interior doors take more abuse than almost any other painted surface in your home. When done correctly, a fresh coat of paint on your doors can make your entire home feel renewed and more valuable.
What You’ll Need: Essential Tools and Materials
Having the right painting tools makes the difference between amateur results and professional finishes. Here’s what you’ll need:
Painting Tools:
- 2-inch angled brush for detail work
- 4-inch foam roller for smooth flat surfaces
- Small roller for touch-ups
- Paint tray with disposable liners
- Painter’s tape for protecting hardware
- A plastic drop cloth or canvas to protect the floors
Preparation Supplies:
- Sandpaper (150-grit and 220-grit)
- Tack cloth for removing sanding dust
- Wood filler for repairs
- Utility knife for scoring tape
- Screwdriver for removing door hardware
Paint Selection:
- High-quality interior acrylic-latex paint
- Semi-gloss or satin finish (never use flat paint on doors)
- Primer if needed
Choosing the Right Paint and Color
Always use interior acrylic-latex paint for interior doors as these paints offer excellent durability and easy cleanup, with premium options providing exceptionally smooth finishes. Semi-gloss is the best choice for most doors because it resists scuffs, cleans easily, and stands up to daily use, while satin finish works well for low-traffic areas but isn’t as durable. For color selection, match your trim color for a cohesive look with popular whites, choose bold accent colors like charcoal or dark grays for drama, and always test colors in your actual lighting before committing to the entire door.
Step-by-Step Guide to Painting an Interior Door
Step 1: Preparation
Proper prep work separates professional results from obvious DIY attempts by starting with removing door knobs, locks, and decorative hardware to prevent paint buildup and ensure clean lines. Clean the entire door with a damp cloth to remove dirt, grease, and fingerprints, then fill any dents or holes with wood filler before lightly sanding the entire door with 150-grit sandpaper, followed by 220-grit for smoothness. Always sand with the wood grain, not against it. Remove all sanding dust with a tack cloth, as any remaining dust will show through your paint finish, and apply primer if painting over stained wood, switching from oil-based paint to latex, or painting new unprimed doors.
Step 2: Setting Up Your Workspace
Protect your floors by laying down a plastic drop cloth or canvas under and around your work area, as paint drips happen even to professionals, so using a paint tray can help control the amount of paint on your brush. You can paint doors in place or remove them, but make sure to also take off the door knobs, as removing doors gives better access but requires more work while painting in place requires propping the door open and stabilizing it to prevent movement. Ensure good lighting to spot drips and missed areas, and provide adequate ventilation for proper drying.
Step 3: Painting Technique for Best Results
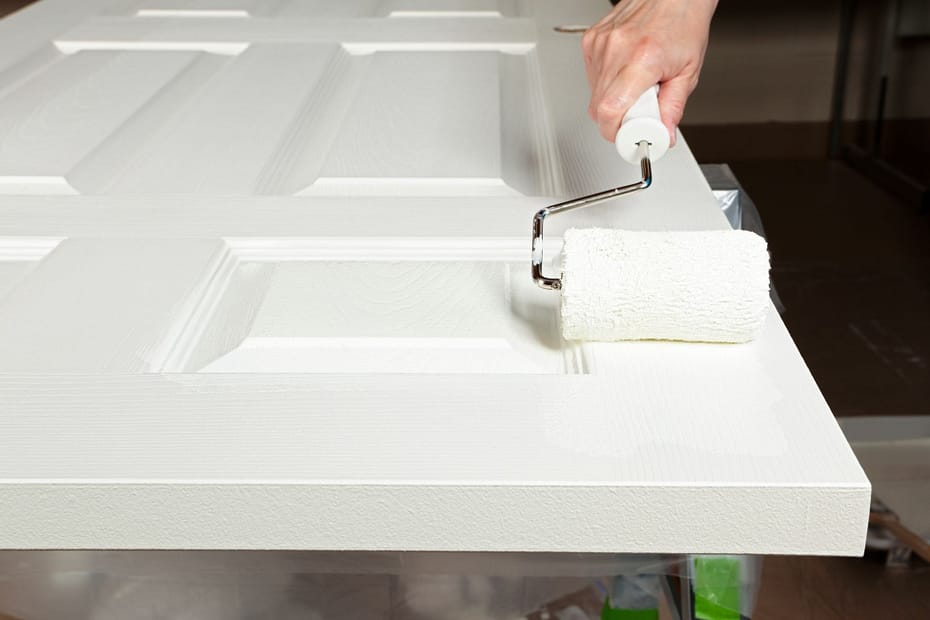
Start with door edges by painting the four edges of the door with your brush, including the hinge edge, top, bottom, and strike side, and don’t overload your brush as excess paint causes drips. For paneled doors, paint recessed panels first using your brush, use the small roller for flat panel centers, then paint vertical stiles, horizontal rails, and finish with outer vertical edges, while for flat doors, paint all edges first then use the 4-inch roller for the main surface working in sections while maintaining a wet edge and finishing with light brush strokes to eliminate brush marks. Apply thin coats rather than one thick coat, watch for paint drips and smooth them immediately, work quickly to maintain wet edges, and don’t press too hard with the roller.
Step 4: Drying and Second Coat
Allow the first coat to dry completely according to the manufacturer’s instructions (usually 2-4 hours). Once dry, lightly sand with 320-grit sandpaper and wipe with a tack cloth to help the second coat adhere better, then apply your second coat using the same paint techniques, as most doors need two coats for even coverage and durability.
Paint Interior Doors: Room-by-Room Considerations
Different rooms require different approaches when painting interior doors, and here are some tips to understand these nuances to help you achieve the best results throughout your home.
Bathroom doors require moisture-resistant paint formulations with excellent ventilation during drying, using essential semi-gloss finishes due to humidity exposure, and considering mildew-resistant additives for optimal longevity. Similarly, kitchen doors face grease, steam, and frequent handling, requiring high-quality semi-gloss paint that can withstand regular cleaning, with slightly darker colors helping hide fingerprints and food stains.
In contrast, bedroom doors can use satin finishes for a softer look, though semi-gloss remains the most practical choice, with lighter colors working well to maintain a peaceful atmosphere. Meanwhile, closet doors benefit from the same quality paint as other doors and can match your trim for a seamless look or serve as accent pieces with bold colors. Finally, basement and utility room doors have moisture concerns, so use moisture-resistant primer and paint, and ensure proper ventilation during the painting process.
Door Hardware: Painting Around and Upgrading
Proper hardware handling during painting can make or break your professional finish, and sometimes upgrading hardware complements your paint job perfectly.
Working with Existing Hardware:
Remove all hardware when possible for the cleanest finish, but if removal isn’t feasible, use high-quality painter’s tape and plastic sheeting while scoring tape lines with a utility knife before removal to prevent paint peeling. Clean hardware thoroughly before reinstallation to ensure optimal results.
Protecting Hinges:
Remove hinge pins if possible and lift the door off, but if hinges must stay, tape carefully around each hinge leaf and use small brushes to cut in around remaining hardware. Consider hinge covers for extra protection during the painting process.
Hardware Upgrade Opportunities:
Painting doors is the perfect time to upgrade outdated hardware by matching new hardware finishes to your home’s overall style, such as brushed nickel, matte black, or brass. Ensure new hardware fits existing holes or be prepared for wood filler and touch-up work, and consider upgrading to modern lever handles or premium knob sets.
Timing Hardware Installation:
Install new hardware after paint is completely cured (usually 7-14 days) and use painters’ tape to mark hardware locations during painting. Keep hardware packaging until installation to prevent scratches and ensure pristine condition.
Front Door Considerations: Special Techniques for Entry Doors
While this guide focuses on interior doors, your front door requires special consideration due to weather exposure and security hardware. During preparation, weather stripping removal may be necessary for complete coverage, security hardware requires careful taping, and you should consider seasonal timing to avoid extreme weather. Remove or protect door numbers, knockers, and decorative elements, then use exterior-grade paint for durability and UV-resistant formulations for doors with glass panels.
Bold colors work well for front doors as statement pieces, though test colors in various lighting conditions throughout the day. Never paint over lock mechanisms or security devices, remove door viewers and numbers when possible, and protect smart locks with plastic covers. For glass panel doors, use painter’s tape and plastic sheeting to protect the glass, consider professional cleaning before painting, and paint the weathered glazing compound using appropriate primer for metal glazing strips.
Common Mistakes to Avoid
Skipping prep work always shows in the final result, so never skip cleaning, sanding, or priming when needed, and avoid using flat paint on doors as it shows every fingerprint and is hard to clean. Stick with semi-gloss or satin finishes, avoid painting in high humidity, extreme temperatures, or dusty conditions, and let each coat dry completely before applying the next, as rushing leads to poor adhesion and brush marks. Additionally, avoid overloading brushes as too much paint causes drips and uneven coverage, so load your brush properly and work systematically for optimal results.
When to Consider Professional Help
While painting doors is a manageable DIY project, certain situations call for professional expertise, including painting multiple doors throughout your home, dealing with lead paint in older homes, wanting guaranteed professional results, having limited time for proper preparation and application, or working with complex door styles requiring specialized techniques. Professional painters have the experience and tools to complete door painting efficiently while ensuring consistent, high-quality results that enhance your home’s value.
Final Thoughts
Learning how to paint an interior door properly transforms your home’s appearance without breaking the budget. The key to success lies in proper preparation, using quality materials, and taking your time with each step. Whether you’re refreshing a single door or updating your entire home, these techniques will help you achieve results that rival professional work. Remember that using the same paint color consistently throughout your home creates a cohesive, professional look, and with patience and attention to detail, your newly painted doors will provide years of beauty and durability.
At Madison Door, we’ve seen firsthand how the right doors and finishes can completely transform a home’s appearance. When you’re ready to upgrade beyond painting and want to explore new doors, windows, or professional installation services, our team is here to help you create the home of your dreams with custom solutions that perfectly fit your style and needs. Reach out to request a free quote today.
FAQs
What is the best method to paint interior doors?
The best method to paint interior doors involves thorough preparation (cleaning, sanding, and priming if needed), removing hardware when possible, and applying thin coats using a combination of brushes for detail work and rollers for flat surfaces while maintaining wet edges.
What kind of paint do you use on interior doors?
You should use high-quality interior acrylic-latex paint on interior doors, as these paints offer excellent durability and easy cleanup. Premium options like Benjamin Moore Advance provide exceptionally smooth finishes that stand up to daily use.
Is it better to paint an interior door with a brush or roller?
It’s better to paint an interior door using both a brush and roller – use a 2-inch angled brush for edges and detail work, and a 4-inch foam roller for smooth flat surfaces to achieve the best professional finish.
What is the most common paint finish for interior doors?
The most common paint finish for interior doors is semi-gloss because it resists scuffs, cleans easily, and stands up to daily use better than other finishes. Satin finish works well for low-traffic areas but isn’t as durable as semi-gloss.