
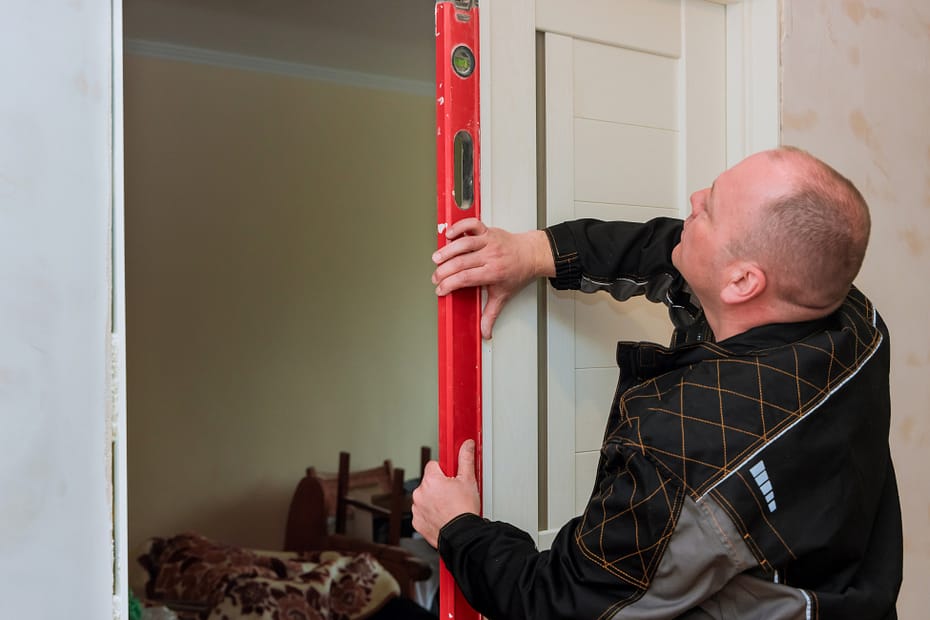
The door installation process begins with a quote, consultation, and precise measurements. After approval, the installer orders the selected door and schedules the work. Installation includes removing the old door, preparing the opening, setting the new unit, sealing gaps, fitting hardware, testing operation, cleaning the area, and completing a final walkthrough.
Replacing an exterior door involves more than choosing a design and booking an installation date. A professional door installation process includes accurate sizing, product selection, opening preparation, weather sealing, hardware adjustment, and final inspection.
Older and custom homes can have nonstandard or out-of-square openings, making accurate measurements and an opening inspection especially important. Knowing the key steps helps homeowners in Madison and Morris County compare quotes and prepare.
What Happens During the Door Installation Process?
The door installation process moves through quoting, measurement, ordering, preparation, installation, testing, and final approval.
Each stage supports the finished door’s fit and performance. ProVia supplies prehung exterior doors as assembled packages, but each unit still needs careful installation.
| Stage | What happens | What you should confirm |
| Quote | The installer reviews photos, goals, and basic project details | Whether an on-site visit is needed |
| Consultation | Style, material, glass, finish, and hardware are discussed | Your budget and priorities |
| Measurement | The opening, jamb depth, swing, sill, and trim are checked | The final door configuration |
| Approval | Product details and work scope are finalized | Every item in the written proposal |
| Installation | The old system is removed, and the new door is fitted | Clear access to the doorway |
| Walkthrough | Operation, seal, finish, and cleanup are reviewed | Warranty and care information |
How Do You Request a Quote for a New Door?
You request a quote by sharing your address, current door details, goals, and clear doorway photos.
Useful photos show the front door inside and outside. Include the frame, threshold, trim, and any storm door. Mention drafts, sticking, damaged wood, water infiltration, or locking problems.
Madison Door invites homeowners to call or text a front door photo when requesting a free quote. You can contact the company at (973) 822-1693 to start the door installation process.
What Happens During the First Consultation?
The consultation identifies the best door system, design, performance features, and installation scope for your home.
A specialist may discuss security, insulation, privacy, maintenance, curb appeal, and hardware. A Center-Hall Colonial may need different proportions than a Cape Cod, Ranch, Tudor, Victorian, or Split-Level home.
Should You Choose a Slab or Prehung Door?
A door slab may work when the existing frame remains square, sound, and compatible. Pre-hung doors include the slab within a matching frame. A pre-hung unit often suits full exterior replacement because its jambs, hinges, and threshold work together.
How Does an Installer Measure the Door Opening?
An installer measures the doorway, frame, jambs, wall depth, swing, sill, and surrounding trim before ordering.
Using a tape measure, the installer records both the width and height at several points. They also check jamb depth, threshold height, casing, hinge side, and available wall space. A framing square helps assess corners, while level and plumb readings reveal an uneven floor or shifted frame.
Homeowners can review how to measure for a new front door to understand the dimensions that an installer checks before ordering.
Why Does the Installer Measure More Than Once?
The installer measures more than once because an older door opening may not be perfectly square. Its width and height can differ at the top, center, and bottom. Rechecking the measurements helps determine whether a standard door unit will fit or custom sizing is required.
What Does the Installer Inspect Before Ordering?
The installer checks the existing opening for moisture, damage, movement, and construction details that could change the work.
Visible concerns include softwood, failed caulk, a damaged sill, or an uneven threshold. The inspection also covers the hinge location, latch side, casing, wiring, and alarm contacts. Some defects remain hidden until workers pull the old door and frame.
How Do You Choose the New Exterior Door?
Choose the new exterior door by balancing fit, material, appearance, glass, security, efficiency, maintenance, and budget.
ProVia offers custom entry door options in fiberglass and steel. Madison Door also provides a ProVia design tool for reviewing styles, colors, glass, and hardware.
A complete system can include the door slab, frame, sidelites, hinges, sill, weatherstripping, and lock. Schlage, Emtek, or multi-point hardware can affect preparation and adjustment.
What Should the Door Installation Quote Include?
The quote should identify the exact product, installation scope, included materials, exclusions, price, and warranty terms.
Look for the brand, model, material, size, swing, glass, finish, frame system, threshold, and hardware. The proposal should also address removal, labor, shims, screws, insulation, sill pan, sealant, trim, casing, caulk, cleanup, and disposal.
Avoid a vague line such as “install new door.” Ask how damaged framing, finish matching, and added construction will be handled.
What Happens After You Approve the Quote?
After approval, the installer confirms every specification, orders the door, schedules the work, and provides preparation instructions.
Final details may include handing, hinge location, glass, frame color, sill finish, and hardware holes. Review every custom pre-hung selection before ordering.
Madison Door offers financing through lending partners for qualified projects. Since terms can change, review the current financing information before deciding.
How Should You Prepare for Installation Day?
Prepare by clearing the work area, protecting nearby items, and giving the crew safe interior and exterior access.
Remove nearby mats, furniture, and decorations. Secure pets and children away from tools. Discuss cameras, alarms, doorbells, parking, and electrical access. Weather can affect exterior work, so installers should communicate schedule changes early.
What Happens on Door Installation Day?
Installation day covers removal, opening inspection, preparation, fitting, fastening, sealing, hardware, trim, and testing.
The exact door installation process depends on the house, frame condition, and selected product. A typical professional sequence includes:
- Protect the floor, wall, doorway, and nearby furnishings.
- Remove the old door slab, hinges, casing, and frame as needed.
- Inspect, measure, and correct the rough opening.
- Install or verify the sill pan and threshold support.
- Insert and center the new door within the opening.
- Add shims, secure the jambs, insulate gaps, and seal the exterior.
- Install hardware, adjust operation, complete trim, and clean the site.
Manufacturer instructions matter because anchoring points and components vary. ProVia publishes resources for single doors, double doors, sidelites, thresholds, frames, and hardware.
How Is the Old Door Removed?
The installer removes the old system carefully to expose the frame and rough opening without unnecessary damage.
Workers may lift the slab from its hinges before removing the interior trim and exterior trim. A pry bar and hammer can separate the casing from the door jamb. Old fasteners, insulation, and sealant must also come out.
Removal exposes the sill, framing, and surrounding wood. A storm door may need separate removal or modification.
What Happens If Hidden Damage Appears?
The installer should explain hidden damage and receive approval before completing work beyond the original quote.
Rot, insect damage, failed flashing, or water infiltration can weaken the sill and framing. An out-of-square existing opening may require extra adjustment. Severe movement could require a carpenter or another qualified professional.
The installer should explain the repair, price change, and schedule effect before continuing.
How Is the Rough Opening Prepared?
The rough opening is cleaned, repaired, leveled, and weather-protected before the new unit is installed.
Preparation can include replacing damaged wood, correcting the sill, removing old caulk, and checking corners with a framing square. The crew may add a sill pan or approved flashing to direct incidental moisture outside.
Correct preparation leaves room for shims, insulation, screws, and a continuous seal without oversized gaps.
How Is the New Prehung Door Installed?
The installer sets the prehung door level, plumb, and square before fastening the jambs and adjusting the slab.
First, the crew applies the required sealant and places the door unit into the opening. They stabilize the hinge side and position shims near every hinge location. Long screws then secure approved points to the wall framing without twisting the jambs.
Next, the installer adjusts the latch side and checks the reveal around each edge. The slab must hang evenly, move without rubbing, and close properly. Therma-Tru’s installation sequence includes preparing the opening, installing a sill pan, placing the unit, shimming at the hinge locations, fastening the lock-side frame, adjusting the sill, and weatherproofing the opening.
How Does the Installer Seal and Insulate the Door?
The installer protects the sill, insulates the frame gap, and seals exterior joints against air and water.
Low-expansion insulation fills the space between the frame and wall. Exterior-grade caulk closes joints around the door and trim. ENERGY STAR recommends weatherstripping doors and caulking around openings as common air-sealing measures. Product ratings cannot compensate for gaps or improper installation. NFRC’s U-factor indicates how well a door, window, or skylight limits heat loss; lower values indicate better insulating performance.
Proper installation also requires the crew to seal an exterior door frame using suitable insulation, weatherstripping, and exterior-grade sealant.
How Are the Lock and Hardware Installed?
The installer fits and adjusts the handleset, latch, deadbolt, strike plate, hinges, and any multi-point hardware.
Factory preparation may include a drilled hole pattern for selected hardware. The installer may still drill pilot holes, insert fasteners, align the strike plate, and adjust the latch. Screws must hold securely without distorting the door jamb.
After workers install hardware, they test the key, handle, and lock several times. Every locking point should engage without forcing the slab.
What Finishing Touches Complete the Installation?
Finishing touches include replacing trim, sealing edges, touching up surfaces, cleaning the doorway, and removing debris.
New casing covers the interior space between the jamb and the wall. Exterior trim protects the perimeter and provides a finished appearance. The crew may fill small holes, apply caulk, or complete agreed-upon paint work.
Installers should remove packaging, dust, tools, and old materials before leaving.
How Does the Installer Test the New Door?
The installer tests alignment, swing, latching, locking, threshold contact, weatherstripping, and visible gaps.
A correct door moves smoothly and remains aligned with the frame. The latch enters the strike plate without lifting or pulling the slab. Even the space around the edge helps confirm a square unit.
A dollar bill test can check weatherstripping contact. Close the door on the bill, then pull gently. Light resistance suggests contact, although professional judgment should guide final adjustment.
How Long Does the Full Door Installation Process Take?
The full door installation process includes both the product lead time and the on-site installation time.
Product lead times vary according to custom sizing, glass, finishes, hardware, manufacturing schedules, and delivery. Once the door arrives, the on-site schedule depends on the opening, door configuration, and any repairs discovered during removal. Ask the installer to provide separate estimates for product lead time and installation-day work.
More complex projects may require additional time. Sidelites, transoms, unusual openings, hidden damage, structural repairs, and weather-related scheduling can extend the project. Your written proposal should separate the estimated product lead time from the expected installation-day schedule.
What Happens During the Final Walkthrough?
The final walkthrough confirms the completed scope and shows you how to operate and maintain the new entry door.
The installer should demonstrate the latch, lock, threshold, and any electronic hardware. Review the trim, glass, finish, seal, cleanup, and operation. Keep the proposal, care instructions, and warranty records.
Ready to Start Your Door Installation Process?
A successful door installation process begins with a clear quote and ends with a fitted, sealed, and tested entry system. Madison Door helps homeowners explore custom doors and professional installation throughout Madison and nearby Morris County communities.
Request a free quote to discuss your opening, design goals, hardware, financing options, and next steps. Call or text a photo of your front door to (973) 822-1693.
Key Takeaways
- The door installation process starts with photos, consultation, measurements, and a detailed written quote.
- Professional measurement covers the opening, frame, jambs, sill, wall depth, trim, swing, and hardware needs.
- Opening preparation supports a square frame, a secure lock, effective insulation, and a weather-resistant seal.
- Installation includes shimming, fastening, insulating, fitting hardware, adding trim, and testing operation.
- Hidden damage should be explained and approved before extra repairs begin.
- The final walkthrough covers operation, appearance, cleanup, care, and warranty information.
FAQs
Can You Install a New Door Without Replacing the Frame?
A slab may fit a sound, square frame, but many exterior projects need a complete prehung unit. Existing hinges, threshold, and seals must remain compatible.
Can an Exterior Door Be Installed During Winter?
Cold-weather work may be possible when conditions allow safe installation and proper sealant use. The installer should protect the opening and follow product requirements.
What Happens If the Door Does Not Close Properly?
The installer should check hinges, shims, jamb alignment, threshold contact, latch position, and strike plate placement. Avoid forcing the lock or slamming the slab.
Should I Keep the Warranty Documents?
Yes. Keep the warranty, final proposal, product labels, care instructions, and installer contact details. These records support future service and maintenance.